Water Heater 101 - Safety Measures Everyone Should Know

Schedule Today


Were you hunting for know-how about Do’s and Don’ts of Hot Water Heater Safety?


Important Hot Water Heater Safety Tips
Warm water is a day-to-day need for every household, whether for a long, relaxing bathroom, washing, or food preparation. Warm water can also save you from some unpleasant situations, for instance, a stopped up toilet.
That stated, hot water heater are not without risks. These pro ideas will certainly aid you and also your family members use a water heater correctly and safely.


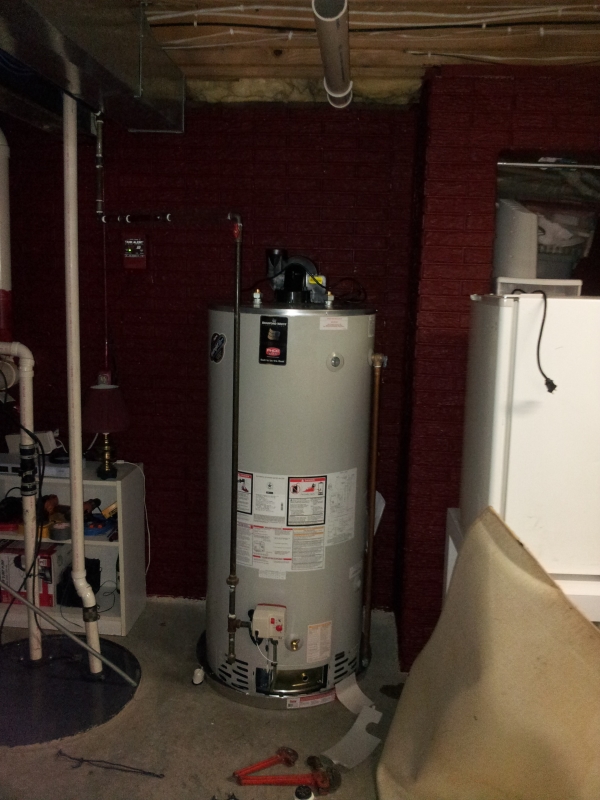
Check your Stress and also Temperature Level Valves


Your water heater's temperature as well as pressure valves control the temperature as well as pressure within the water heater storage tank. These valves will protect against a surge if your container obtains also warm or if the stress surpasses risk-free degrees.
Regrettably, these security gadgets provide no warning when they go bad. You can validate your shutoff's efficiency by holding on to the valve's lever. If it is in good condition, water should flow out. If no water spurts or a flow is launched, hurry and get your valves taken care of.


Wait a number of hours for the water container to warm up


It will certainly take your hot water heater a number of hours to completely warm up, so examine it occasionally by switching on a faucet to make sure it's getting warm. The advised temperature level is 120 ° F (49 ° C.


Check for fire risks.


As you check your shutoffs, offer its environments an once over. Scan the location for fire dangers, particularly if you use a gas-powered hot water heater.
First, check for combustible products like fuel, gas tanks, and also various other heat-generating appliances. Next off, look for little bits of paper and timber, consisting of trash. Do not deal with your trash close to your hot water heater tools.
You would do well to maintain any kind of clothing far from your water heater. Need to a fire beginning, these materials will promote its spread. That claimed, your laundry line should not be close to your hot water heater.


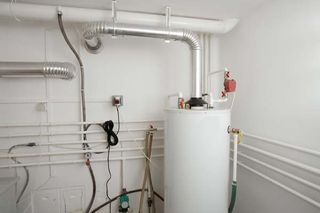
Constantly preserve proper air flow.


If your hot water heater isn't correctly aired vent, it'll lead fumes right into your house. This could cause respiratory system problems and offer you cough or an allergic reaction.
A good air vent must face up or have an upright angle, leading the smoke away from the house. If your vent doesn't follow this layout, it may be an installation mistake.
You need a plumber's assistance to fix inadequate water heater air flow.


Protect your tools from children.


Your gas heating system's equipment is sensitive. It is inadequate to remove flammable material. You must protect your kids from feasible accidents, as well as protect your hot water heater from children's inquisitiveness. Impose a safety zone concerning 3ft around your water heater. You can mark the location out with red tape or merely inform your youngsters on why keeping away from the funny-looking tools is best for them.
If you've obtained a major situation of interested cats, you can give them a well-coordinated excursion of the heating devices and also exactly how it helps them obtain the best bathrooms!


Teach your household just how to turn off the hot water heater.


During this trip, reveal your family exactly how to switch off the heater, specifically if it is a gas heater. They ought to additionally know when to turn it off. As an example, if there is a gas leak, if the water pressure goes down too low, or if the hot water heater is overheating. You need to also shut off your hot water heater when you'll be away for a few days, as well as when the storage tank is vacant.


Always predetermined the optimum temperature level.


Hot water burns in your home prevail. You can protect against accidents, save power and also respect the environment simply by presetting your water heater's optimum temperature level. The most convenient hot water temperature level is 120F. Water at this temperature level is safe for adults, kids, as well as the senior.


Verdict.


With correct maintenance, your water heater can serve you for more than 15 years. Always remember to arrange a regular check-up with your plumbers to check for anomalies and flush out any type of sediments. Nevertheless, a shutoff check need to be extra frequent. Inspect your valves every three months.


REASONS YOUR HOT WATER HEATER IS NOT WORKING & HOW TO FIX


Loose or Damaged In-Line Valve


Unlike a water leak near the bottom of your water tank, a water leak on top of your system can be easily fixed. A common cause of water tank leaks includes a loose in-line valve. This is a handle that is located at the top of the water tank that is engineered to activate or deactivate the flow of water. To fix this problem, you will need to secure the nut that holds the ball or in-line valve in its location. If the leak becomes more severe once it is tightened, you will be required to travel to your local hardware store to purchase a new in-line valve for your water heater.


Damaged Pressure Relief Valve


Most types of water heaters are equipped with a pressure relief valve that is engineered to discharge pressure from the water tank when it becomes too high. If this valve on top of your water heater begins to leak, we recommend purchasing a new one online or from your local store. The process of removing and replacing pressure relief valves is not complicated.


No Warm Water


If you have an electric water heater in your home, the most typical cause of a lack of warm water is a broken heating element. Your water heater is equipped with two heating elements that are tasked with heating incoming water in the water tank. Once a heating element begins to malfunction, you will have little to no hot water to use for showering, cleaning, and laundry.


On the other hand, there are a variety of problems that may stop the production of warm water in a gas water heater. This issue may be produced by a blown-out pilot light or a malfunctioning gas valve. A lack of hot water in your house may also be caused by a damaged thermocouple. Each of these components is able to be easily replaced by purchasing new components. If your hot water heater is not working, you should either purchase new parts or call a licensed plumber to receive help with a water heater repair.


Low Supply of Hot Water


Are you continuously running out of warm water? This issue may be a byproduct of a cracked dip tube. This tube is engineered to push cold water to the base of your water tank to be heated. Once a crack or hole begins to form in the dip tube, the incoming supply of cold water may be released near the top or middle of your tank. As a result, the cold water on top of the tank will be sent to the faucets and showers in your house. This hot water heater problem can only be fixed by replacing the dip tube on your system. Since the process of installing a new dip tube is complex, we recommend calling a certified technician for help.


A low supply of warm water may also be a signal of excess sediment buildup in your water tank. As your water heater reaches the middle of its life cycle, minerals in water including magnesium and calcium will begin to collect at the base of the water tank. As the minerals continue to grow, there will be less room in the water tank to store hot water. To resolve this problem, flush your water heater to remove the excess minerals.


Low Water Pressure


Low water pressure is not always caused by a malfunctioning water heater. If you live in an older home with smaller water pipes, the flow of water will be restricted prior to reaching our kitchen or bathroom skins. The only way to eliminate this hot water heater problem is to connect new ¾-inch water lines to your system. Another type of problem that may negatively impact your water pressure includes calcium deposits in water pipes.


Takes a Long Time to Produce Warm Water


It should not take longer than a couple of minutes to recover warm water once your water tank becomes empty. If it takes an hour to receive warm water from your water heater, this is an indicator of a contaminated burner orifice. On the other hand, a low supply of hot water can be fixed by increasing the gas pressure on your water heater. To receive assistance with cleaning a burner orifice or adjusting gas pressure, contact a licensed technician in your area to receive emergency assistance with this hot water heater problem.

https://www.wmhendersoninc.com/blog/8-reasons-your-water-heater-is-not-working-how-to-fix/


Important Hot Water Heater Safety Tips


As a keen reader on What Measures Should You Take to Use Water Heaters, I thought sharing that piece of content was necessary. Appreciated our write up? Please share it. Let other people check it out. We take joy in reading our article about Do’s and Don’ts of Hot Water Heater Safety.


Get A Free Estimate

How To Replace A Tub (For Beginners).

Rates


Here below you can discover a lot of amazing insight relating to How to Install a Bathtub.


A Step-by-Step Guide to Installing a Bathtub
Installing a bathtub isn't exactly rocket science, yet it does call for strong plumbing, woodworking, as well as in some cases, tiling skills. Replacing an old tub with a new one is likewise a moderately tough job. If the old bathtub is easily easily accessible, the job can relocate immediately; if you need to open up a wall to eliminate the old bathtub and also place the brand-new tub, the task is much harder. In either case, the project is within a home handyman's skills, although you will certainly require an assistant to leave the old tub and also embeded in the brand-new one. Make certain you have certified on your own for the task and fit trying it. Instead of hiring a contractor to take control of a halfway-completed job, it is far better to think about employing one prior to you begin. Chances are you might require an expert plumber to make tube connections.
This write-up will certainly assist you install a new bathtub in your bathroom if you have actually currently bought a brand-new tub and do not need to transform the plan of your previous water supply pipelines.
Your tools and material list ought to consist of the following:


  • New Bath tub

  • Hammer

  • Pipeline Wrenches

  • Prybar

  • Safety Glasses

  • Level

  • Pliers

  • Flexible Wrench

  • Putty Knife

  • Screwdriver

  • Cold Chisel

  • Measuring tape

  • Pipe Caps


  •  

Removing Old Taps


If you require to replace old taps with new ones as a part of your installment, then the first thing you should do is separate the supply of water. After doing so, turn on the faucets to drain any kind of water staying in the system. The process of getting rid of the existing taps can be fairly problematic as a result of the restricted accessibility that is frequently the instance.
Use a container wrench (crowsfoot spanner) or a tap tool to reverse the nut that connects the supply pipelines to the taps. Have a fabric all set for the continuing to be water that will originate from the pipes. As soon as the supply pipelines have been eliminated, use the exact same tool to loosen up the nut that holds the faucets onto the bath/basin. You will require to stop the solitary faucets from turning throughout this process. When the faucets have been eliminated, the holes in the bath/basin will certainly have to be cleaned up of any kind of old sealing compound.
Prior to carrying on to fit the new taps, contrast the pipe links on the old taps to the brand-new faucets. If the old taps are longer than the brand-new taps, then a shank adapter is needed for the new faucets to fit.


Suitable New Touches


If the tails of the new faucets are plastic, after that you will need a plastic port to stop damages to the thread. One end of the port fits on the plastic tail of the faucet and also the other end offers a connection to the existent supply pipes.
If you require to fit a monobloc, after that you will certainly call for decreasing couplers, which links the 10mm pipeline of the monobloc to the basic 15mm supply pipeline.
Next off, position the tap in the installing opening in the bath/basin making certain that the washers are in location in between the faucet and also the sink. Secure the tap in place with the producer supplied backnut. When the faucet is firmly in position, the supply pipelines can be linked to the tails of the faucets. The faucets can either be linked by utilizing corrugated copper piping or with regular faucet connectors. The former type must be attached to the faucet ends first, tightening up only by hand. The supply pipes can later be attached to the other end. Tighten both ends with a spanner after both ends have been linked.


Setting up the Tub


Utilizing both wood boards under its feet, put the tub in the needed position. The wood boards are helpful in evenly spreading out the weight of the bath tub over the location of the boards as opposed to concentrating all the weight onto 4 small points.
The next goal is to ensure that the bathtub is leveled all round. This can be attained by examining the level and also adjusting the feet on the bathtub until the spirit level reads level.
To install taps, fit the bottom of the furthest flexible faucet port to the proper supply pipe by making a compression join; then do the same for the various other faucet.
Turn on the supply of water as well as check all joints and brand-new pipework for leakages as well as tighten them if required. Fill up the tub and also examine the overflow outlet and the regular electrical outlet for leakages.
Lastly, take care of the bath paneling as described in the manufacturer's instruction manual. Tiling as well as sealing around the bathtub should wait till the tub has been made use of a minimum of once as this will resolve it into its final placement.


Getting ready for the Installation


First of all, the supporting structure provided with the bathroom ought to be fitted (if required) according to the manufacturer's guidelines. Next off, fit the taps or mixer to the bathtub. When suitable the faucet block, it is essential to make sure that if the faucet comes with a plastic washing machine, it is fitted in between the bath and also the taps. On a plastic bathroom, it is likewise sensible to fit a sustaining plate under the taps device to prevent pressure on the tub.
Fit the adaptable faucet ports to the bottom of the two faucets utilizing 2 nuts as well as olives (sometimes provided with the tub). Fit the plug-hole electrical outlet by smearing mastic filler round the sink electrical outlet hole, and afterwards pass the outlet via the hole in the bath. Use the nut provided by the manufacturer to fit the plug-hole. Check out the plug-hole outlet for an inlet on the side for the overflow pipeline.
Next off, fit the end of the versatile overflow pipe to the overflow electrical outlet. After that, screw the pipeline to the overflow face which ought to be fitted inside the bathroom. Make certain you use every one of the provided washers.
Attach the trap to the bottom of the waste electrical outlet on the bathtub by winding the thread of the waste electrical outlet with silicone mastic or PTFE tape, and screw on the catch to the outlet. Link all-time low of the overflow tube in a similar manner.The bath need to now be ready to be suited its last position.


Tiling Around the Tub


In the location where the bath satisfies the floor tile, it is required to secure the accompanies a silicone rubber caulking. This is essential as the fitting can relocate enough to break a rigid seal, triggering the water to pass through the wall between the bath as well as the tiling, leading to issues with wetness and feasible leakages to the ceiling below.
You can select from a variety of coloured sealants to blend in your fixtures and also fittings. They are offered in tubes as well as cartridges, and also can sealing gaps as much as a size of 3mm (1/8 inch). If you have a bigger gap to fill, you can fill it with spins of soaked newspaper or soft rope. Keep in mind to constantly fill up the tub with water prior to sealing, to enable the motion experienced when the bathtub is in use. The sealer can fracture fairly early if you do not take into account this movement prior to securing.
Conversely, ceramic coving or quadrant floor tiles can be made use of to edge the bath or shower tray. Plastic strips of coving, which are easy to use and cut to size, are likewise quickly offered on the marketplace. It is a good idea to fit the floor tiles using water-resistant or waterproof adhesive and cement.


How to Install a Freestanding Bathtub?


Installing a freestanding bathtub or any kind of bathtub is not a difficult task if you have a sophisticated guide on installing a freestanding bathtub in your bathroom. Aside from getting the freestanding bathtub to your bathroom, you can do all the work without paying a plumber. A bathroom with a bathtub is a retreat where you can feel the sensation of coming home and soaking in that hot water. It is a great way to remove all the stress from your day.


This guide will walk you through installing a freestanding bathtub in simple steps and help you find relief.


Slope


Make sure your bathroom has a proper slope. If your floor lacks a slope, the water flow to the drain will not function, which leads to a blocked drain which can cost you money. You can use the level device to see your bathroom's vertical and horizontal aspects. Once you have that information, you must carry out the next step.


Placement


A freestanding bathtub has a unique characteristic that helps you bring elegance to your bathroom. A freestanding bathtub comes in various sizes and shapes suitable for different types of bathrooms.


According to the information you gathered from the level device, you must pick a bathtub that suits your style and fits your bathroom aesthetically. You can place a freestanding bathtub virtually anywhere, such as in the corner, near the wall, or even at the center of your bathroom. However, you must ensure proper plumbing where you want to install the tub. If not, then you must call a plumber.


Clean the bathroom floor


After deciding where to place the bathtub, you must clean the entire bathroom floor so that the dust and debris do not accumulate underneath the tub. Simple cleaning is enough, and you will clean it again after the installation.


Steps to Install a Freestanding Bathtub:


STEP 1: Place the protective blanket in the adjacent area where you want to install the bathtub. It will help you protect the bathtub's sides when you do the installation.


STEP 2: Now, place the 4x4 lumber in the area where you want to install the bathtub. Place the bathtub on top of the lumber, and align the drain line with the bathtub drain.


STEP 3: A freestanding bathtub comes with a drain kit. If not, make sure you purchase one with your bathtub. You can pop that drain kit and align it with your bathroom drain line. Ensure that you tighten the drain nut enough so there is no water leakage. You must also clean the bathtub’s drain to remove the factory dirt and debris.


STEP 4: Clean the drain hole in your bathroom. It helps to do the installation without any water blockage. A drain cleaner or bleach will suffice. Once the drain dries entirely, take a small amount of clear silicon and place it around the underside of the pipe flange.


STEP 5: Attach the drain tailpiece to the bottom of the bathtub. Place the rubber or plastic bushing with the plumbing material at the top of the tailpiece and screw the drain nut up the tube until it tightens both the bathtub’s drain and the drain tailpiece. Now you must add the lubricant to the seal to ensure there is no water leakage in the pipe connection.


STEP 6: Place caulk around the bottom edge of the bathtub. Take out the lumbar support and carefully bring the bathtub to the floor. Use a damp cloth to clean the excess caulk and debris and plumber putty to cover the tub drains and the floor.


Tips to Maintain a Freestanding Bathtub:

 
  • Always look for the clog in the drain. You can pull it out with a small stick if hair or debris is in the gutter.


  •  
  • Use mild cleaning components, which will help you preserve the bathtub for a long time and will also help you remove surface-level scratches.


  •  
  • Do not use strong solutions such as concentrated bleach to remove stains. Instead, mix water and diluted bleach with a ratio of 10:2, respectively. Apply it to the tub's surface and leave it for 15-20 minutes to remove any surface-level stains.


  •  
  • Always check the floor drain. You may unclog it using any small sticks or a small vacuum to suck out all the debris.


  •  
  • Check the heater or faucet immediately if you smell rust or grease in the water. Rust in the water may stain or damage the bathtub in the long run.


  •  
  • If you want to sand the bathtub, try using 400 grit sandpaper or 600 grit sandpaper for a more refined finish.

  •  

https://www.magnushomeproducts.com/blogs/inspired-living/how-to-install-a-freestanding-bathtub-a-diy-method-with-6-steps


How to Install a Bathtub Yourself


I was shown that editorial about How to Install a Bathtub: Install an Acrylic Tub and Tub Surround from an acquaintance on our other domain. Appreciated our posting? Please share it. Help another person locate it. Thanks for going through it.


Here

1 2 3 4 5 6 7 8 9 10 11 12 13 14 15